How to set up V2Ray in Microsoft Windows system
Simply, only 3 steps can be completed .
| Step | Configure |
|---|---|
| 1 | Get v2ray account information |
| 2 | Download the client software that can be used on the Windows desktop |
| 3 | Windows configuration v2ray client |
The first step is to get V2ray node information
A usable V2ray node information (need to include the following information: server address, port number, encryption method, password).
This information is included in the package you have purchased. The subscription link includes all node information. Just find the subscription link.
Open the detailed information page of the package you have purchased, and swipe down to the subscription link position, as shown in the figure below:
Please check this if you don’t have node to use : Let’s Buy A Node To Surf The Internet
The second step download the software client
Many softwares on the Windows platform are available, and it is recommended to use V2rayN as the software client.
V2rayN is a Windows desktop client software specially designed for v2ray, so it is extremely convenient to add. It supports many protocols, including almost all popular protocols such as vmess\ss\ssr.
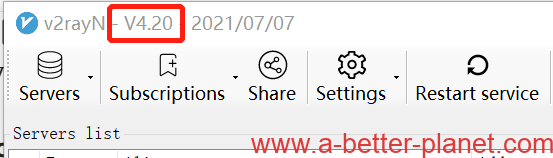
Windows platform V2rayN software download: It is recommended to choose version 4.20 or above
| System | Download software | Download Backup | Setting After Installed | More Details |
| Windows | v2rayN-4.36 | v2rayN-4.36 | Subscriptions, Settings, paste Subscription link. Subscription, Updates. | Tutorial: how to use |
The third step is to configure the V2ray client on Windows
V2rayN setup tutorial
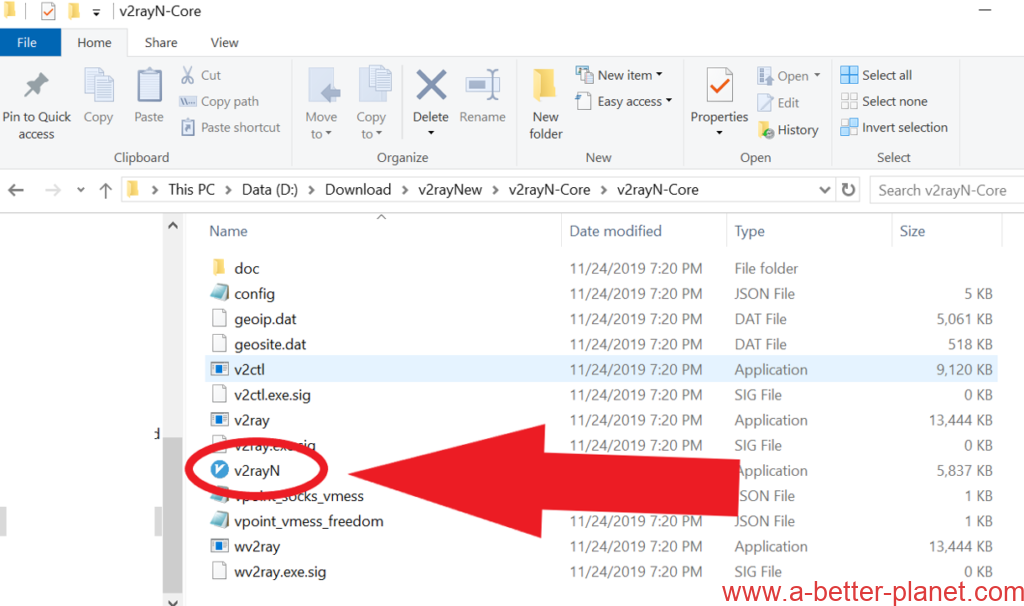
Install
Find the V2rayN.zip file in your download folder. Unzip it (right click > Extract all… ). Then, open the unzipped folder. Double-click on the “V2rayN” file to install.
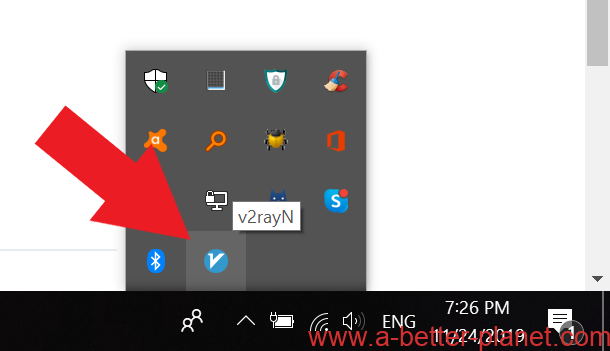
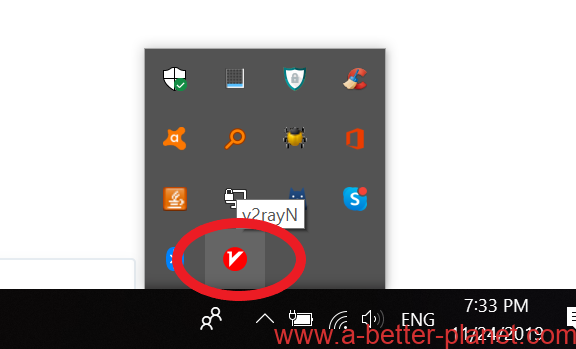
If there’s a pop-up, click “run”.Once installed, you can find the app by searching for “v2rayN” in the search box next to the start menu. You can find V2rayN in the tray at the bottom right corner of your screen.
Add the servers
Copy the subscription link in step 1
1.Open the app by double clicking on the v2rayN icon (blue V) in the tray on the bottom right corner of your screen.
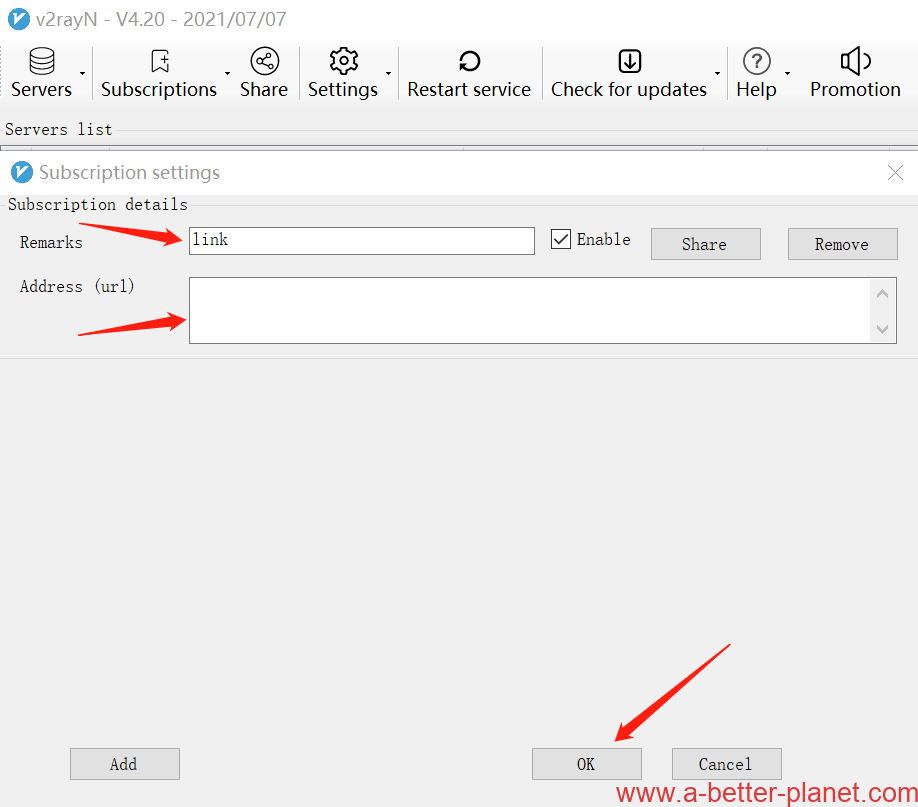
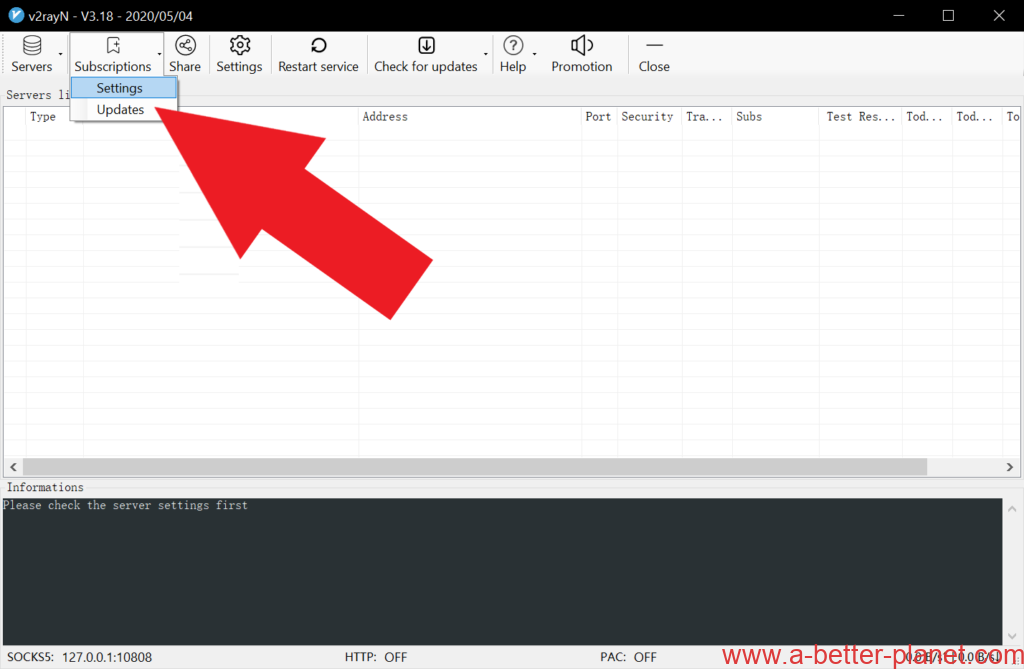
2.Go to “Subscriptions” > “Settings”
3. Click “Add” on the bottom
4. Paste the API link in the url box
5. Click OK
6.Go to “Subscriptions” > “Updates”
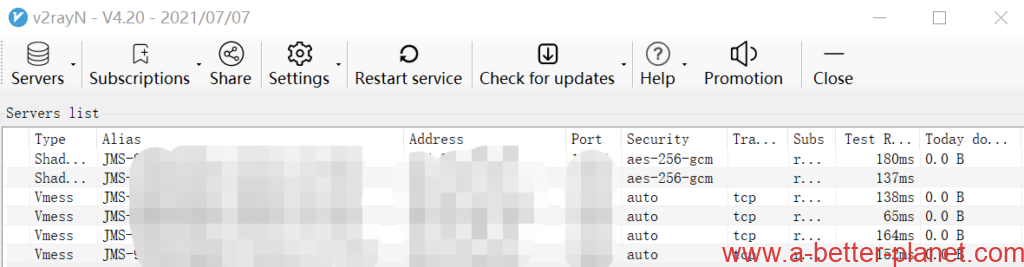
Select a server
Find the v2rayN icon in the tray again
2.This time, RIGHT CLICK on it
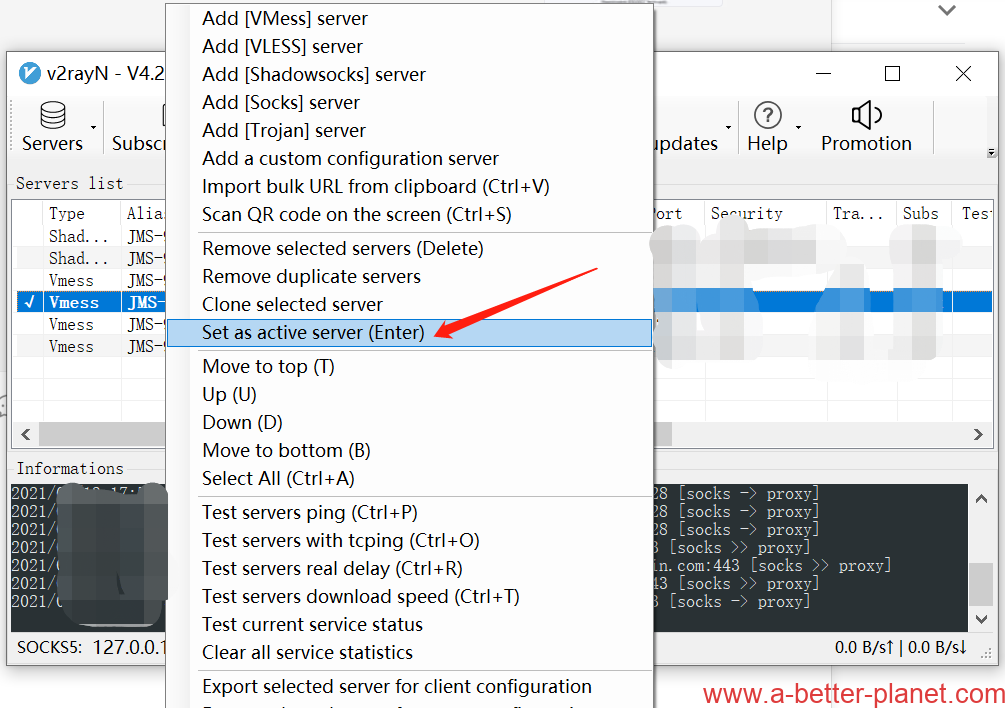
3.Go to “Server” and select a server from the list
Select any node of the 6 listed in the software, “Set as active server “
Select in the tray on the bottom right corner of your screen

Or
Select in the software main front
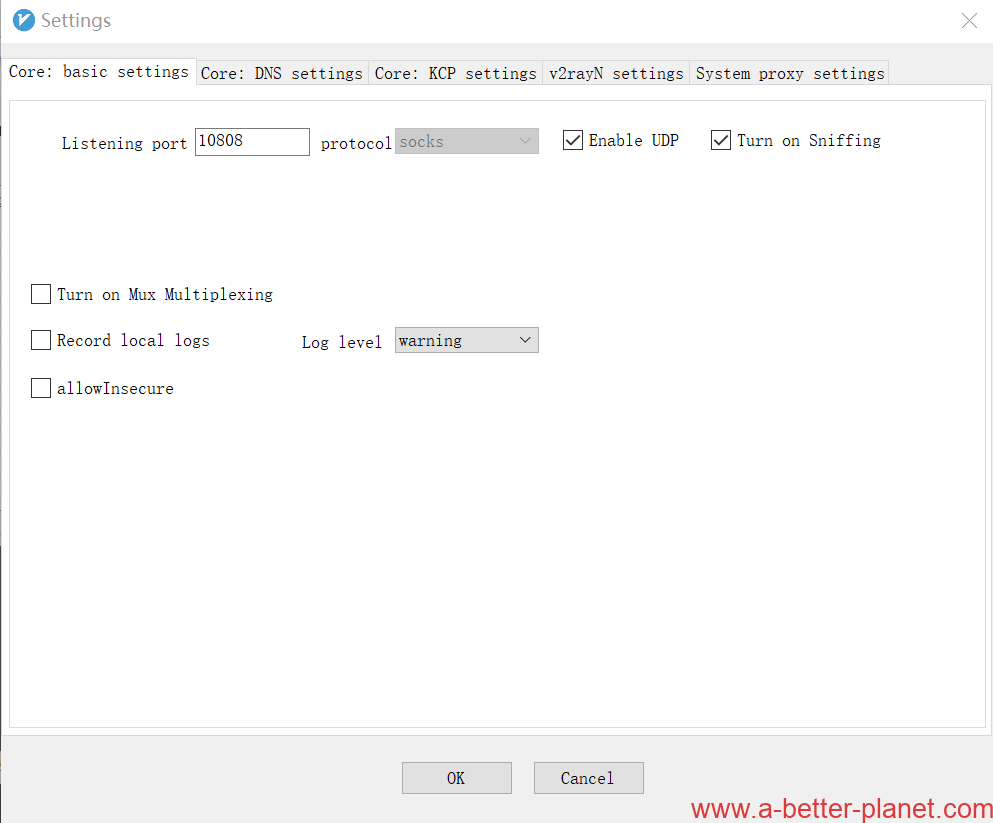
Change the listening port if you want in setting.
Enable UDP is important.
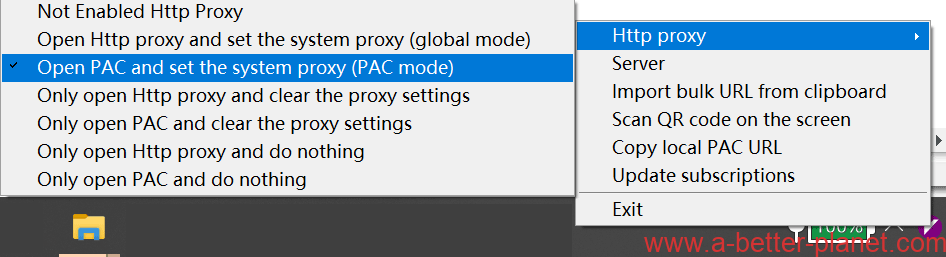
System proxy setting
Different version slightly different
For software version 4.20+
Right click on the V2rayN icon in the tray (bottom right).
Go to “Http Proxy” > “Set system Proxy”
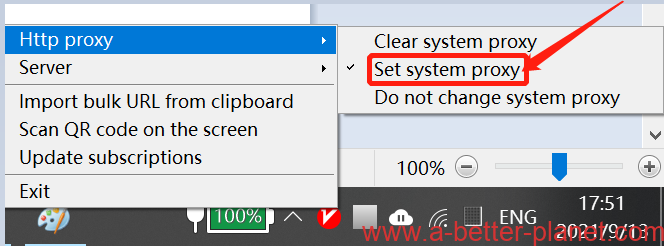
The v2ray icon should turn red when connected.
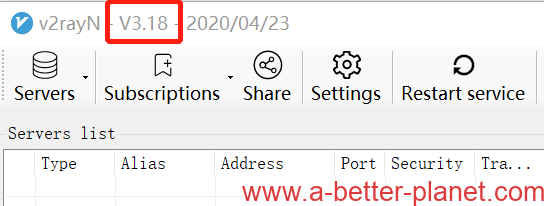
For software version 3.18
Right click on the V2rayN icon in the tray (bottom right).
Go to “Http Proxy” > “Open Http proxy and set the system proxy (global mode)”
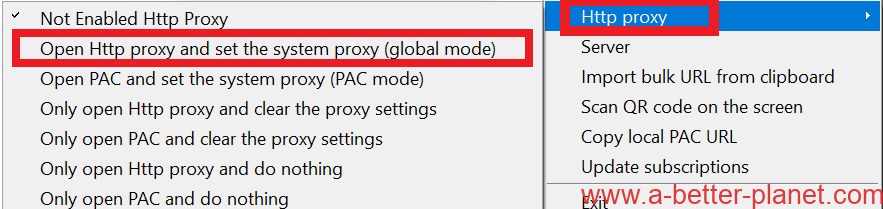
The v2ray icon should turn red when connected.
Now, you can surf the real internet all the way you want.

For experts/advanced skilled users, to save proxy data, you can use PAC proxy mode with proxy settings plugin for browsers , e.g. Proxy SwitchyOmega